Project - Search By Image (Reverse Image Search) - Using Cosine Similarity


Those who are not aware about 'Cosine Similarity'. I would suggest them to spend 5-10 mins in reading this blog. So that we have a basic Idea.
In Previous blog (Link shared above) - we have seen what is Cosine Similarity and It's application. Now, in this Blog - Let's try to implement it in 'Search By Image (Reverse Image Search) application.
What is Search By Image
Search By Image is a image retrieval query technique that involves providing the sample image as an input and it retrieves the Similar Images for us from Database. (Same as of Google Search By Image)
We will implement this in Python.
Step 1
Collect some Sample Images - Here, I created one Folder (Sample_Images) and downloaded few images approx 80-90 in total of different categories. Example: 15 Images of Dogs, 15 Images of Cats, 15 Images of Micky Mouse, 10 Images of Mangoes, 10 Images of Grapes, 10 Images of Stop Symbol.
OR
You can use any Public Dataset available example 'Caltech 101 Dataset' which contains different images of 101 categories.
http://www.vision.caltech.edu/Image_Datasets/Caltech101/
Step 2
Choose any IDE, where you will write code. I choose 'Google Colab' colab.research.google.com/ if your computer has good RAM, and you are using very few Images in a dataset, Then you can run your code locallay as well in VS Code or Jupyter Lab/Notebook or any other editor of your choice.
Step 3
I stored the Images on 'google drive', and I want to use it in my code in Google Colab. So First I need to mount my drive on Google Colab using below code
I stored images here ==> drive.google.com/drive/folders/1JLfGH1ZXW0Y..
](Link)

Step 4
Now we know in Cosine Similarity we apply one formula. And to apply that formula we need two vectors (array). Here we have Images, So first we need to convert the Images into List of array. And to apply operation, our all images should be of same size. Then only we will apply Cosine Similarity formula i.e. compare our input Image with all Database Images (Sample Images) - and filter top 5-10 Results (which best matches).
If suppose your Image is of size 400x400 => and If you converted your Image into Flat Array (List) The total number of columns will be 160000 ==> and If Image is coloured ==> Then 160000 x 3 ==> 480000 which is too high.
and most of the columns (features) are of no use.
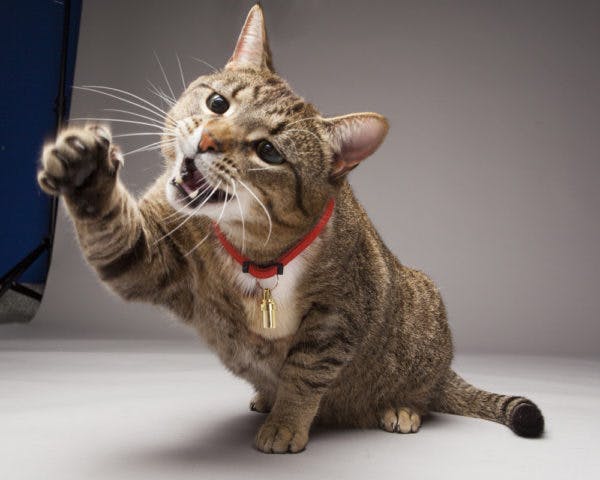
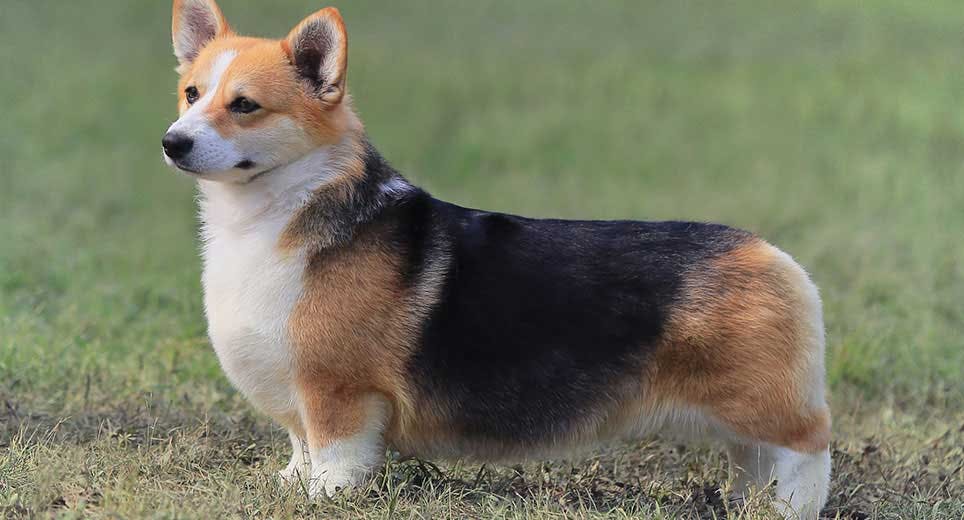
Example - Look at the below 2 Images (cat & dog) - If we have to identify which one is Dog and which one is Cat. We will look only at specific portion (where actual cat/dog exists). If we only look boundries (like wall and other things - we also can't identify which one is dog and which one is Cat)
So, we need to remove few features and keep only those features which are of our use (i.e. portion where exactly object exists).
This we can achieve with CNN (Convolutional Neural Network) which is best for Images.
and rather than using our own Model and Train it, Let's use already existing trained models available on Tensor-flow Hub. We will use VGG16 Model (which has 16 Layers where weights used).
But VGG16 is classification model. and Here our aim is NOT to classify objects. So from existing VGG16 model we will remove the last layer (which classify the images).
https://keras.io/api/applications/vgg/#vgg16-function

In above code, what created model from VGG16 as a base model and we explicitly mention we want output as last 2nd layer (Not last layer).
Step 5
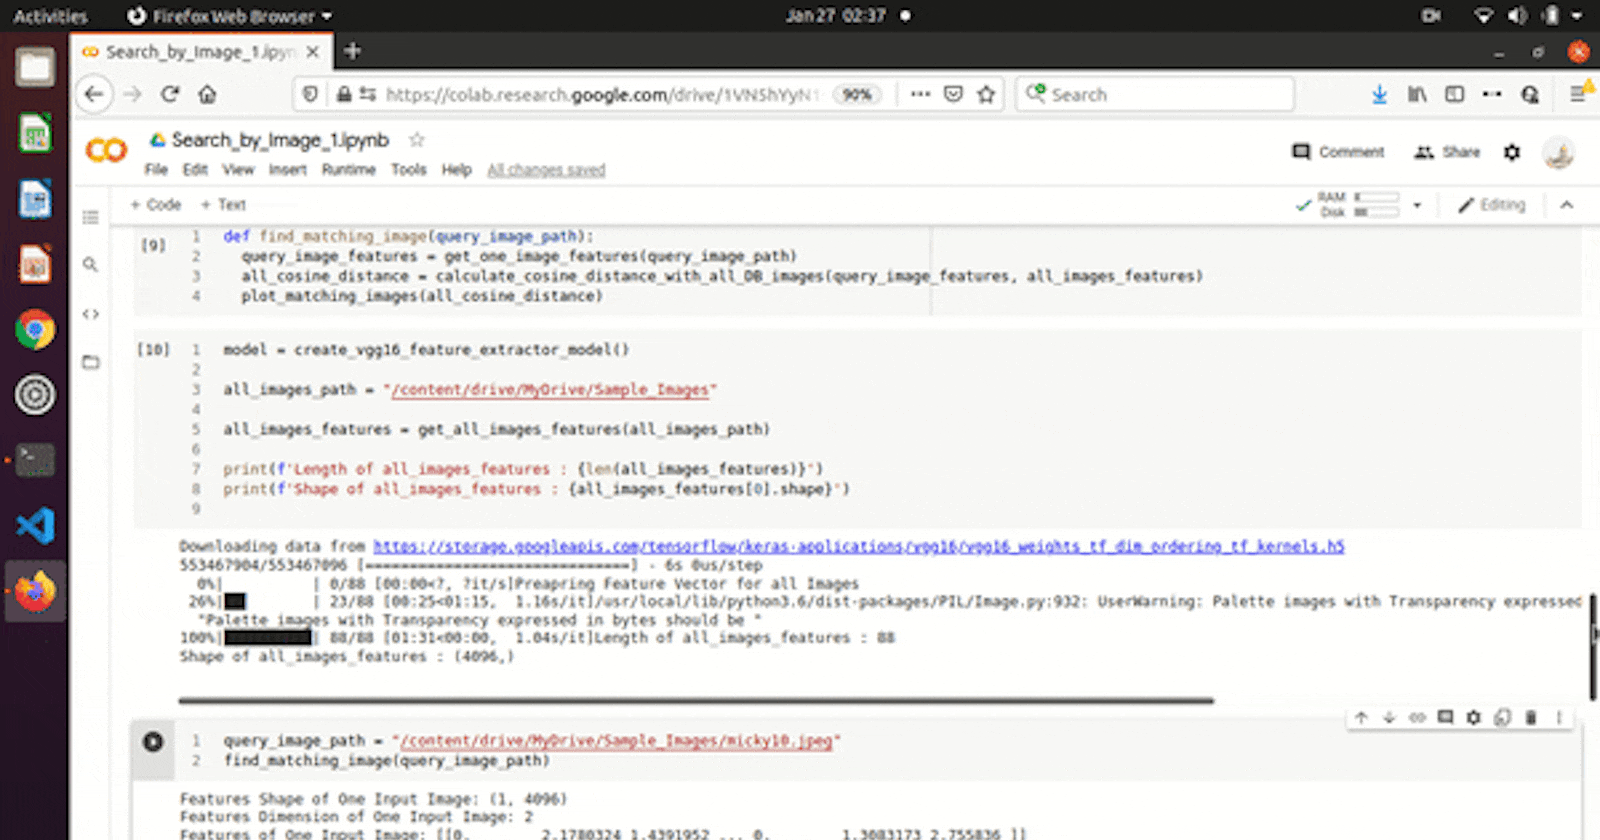
Now our model is ready, lets pass our sample database images from model and extract features for all images and will store in some array (list).
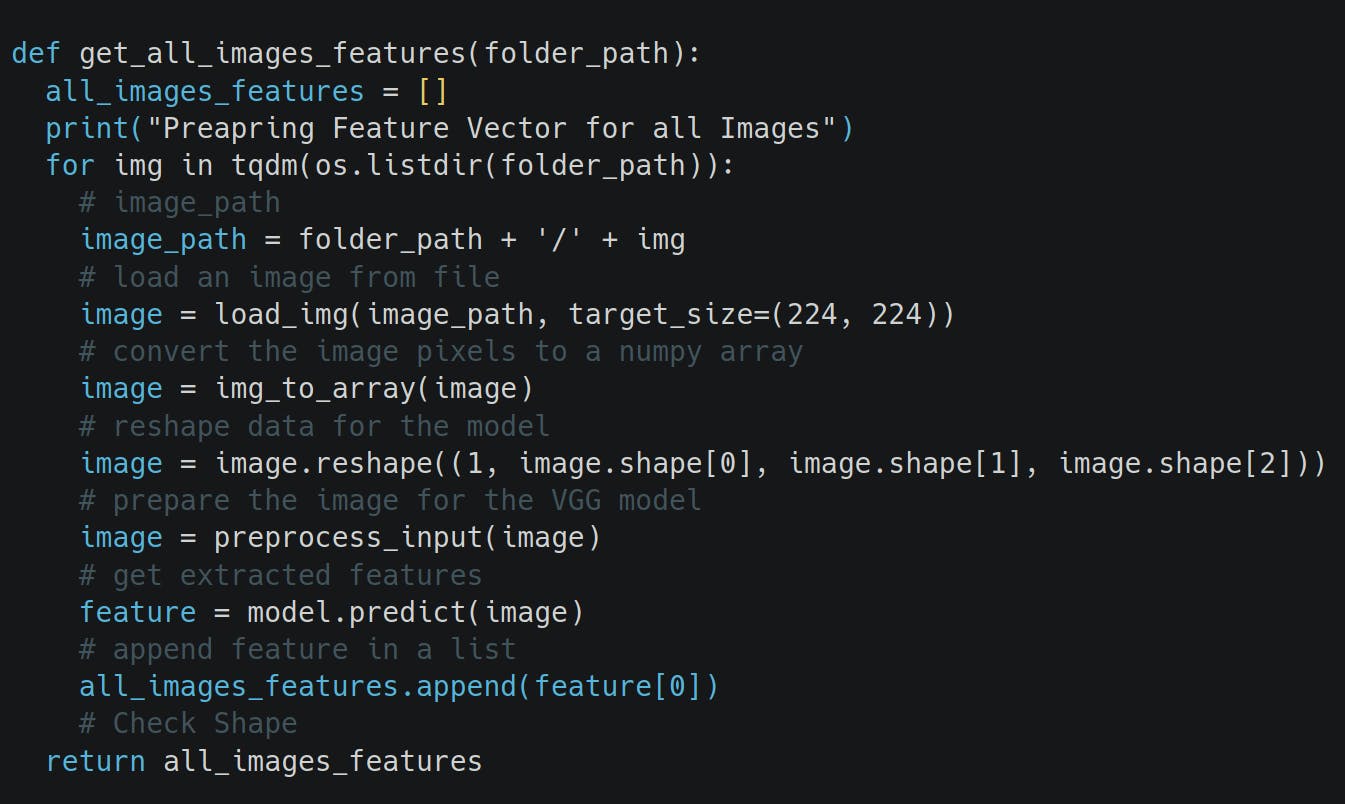
In above code, I used all in-built function provided by Keras;
- Load an Image ==> this will convert our images into same sizes
- Image to array ==> This will convert our images into a 2D Matrix
- Reshape array ==> VGG16 model takes input in some specific format, so it will convert array into that shape
- Preprocess _input ==> It will normalize our array.
Step 6
Let's prepare similar function to extract feature for just 1 Image (i.e. our Input Image)
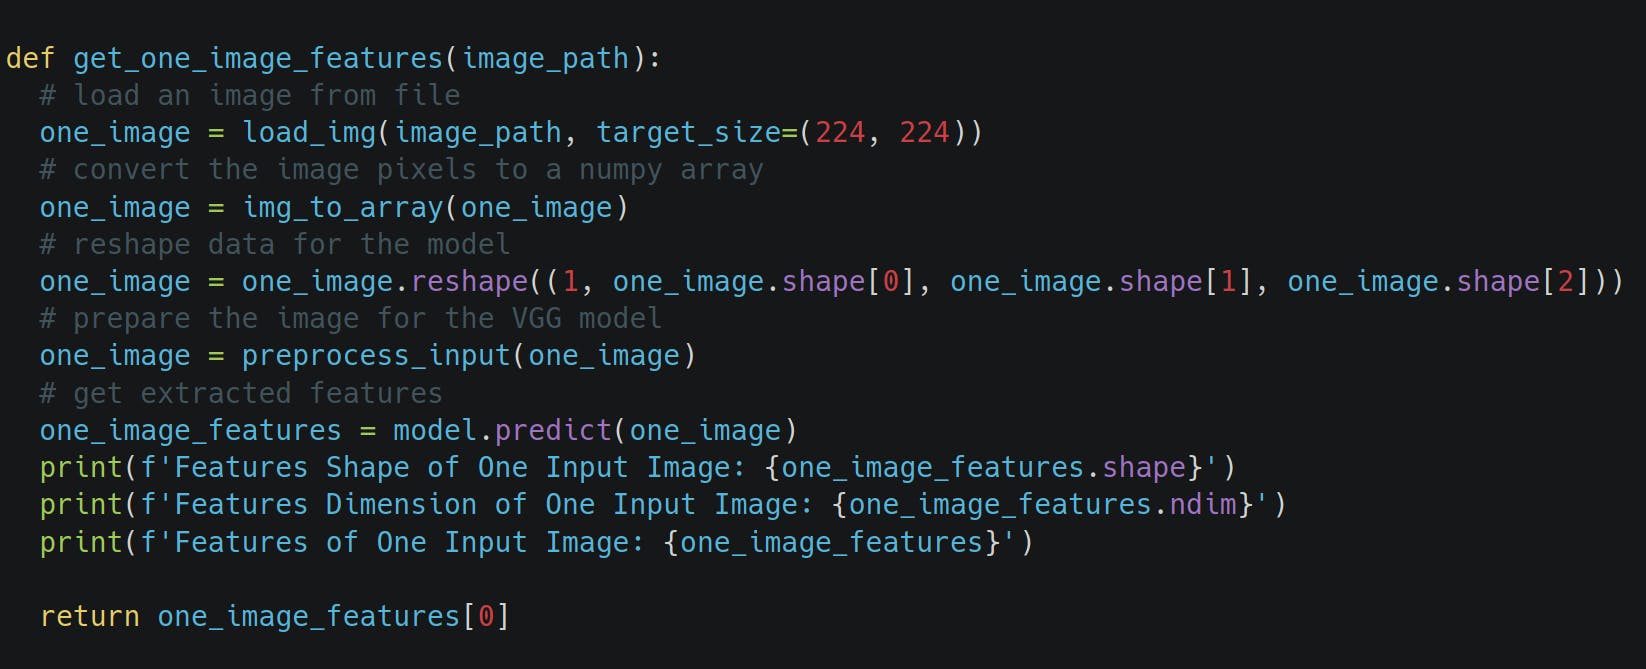
VGG16 model taken input of size (224,224)
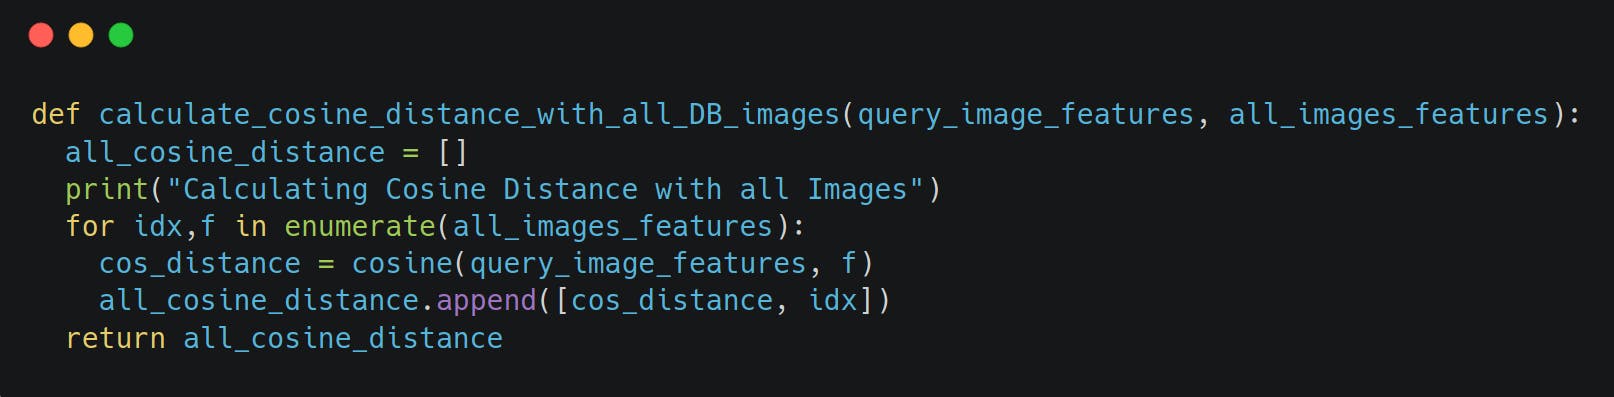
Step 7
Now we have Input Image Vector && vectors for all Database Images. Let's apply Cosine Distance formula one by one on all Images by compariing with Input Image
Less the distance, More the Cosine Similarity.
We will Store all distance in one Array, and will store in some list and Then we will Sort it (ascending Order). and Then will fetch top 5-10 distances from List.
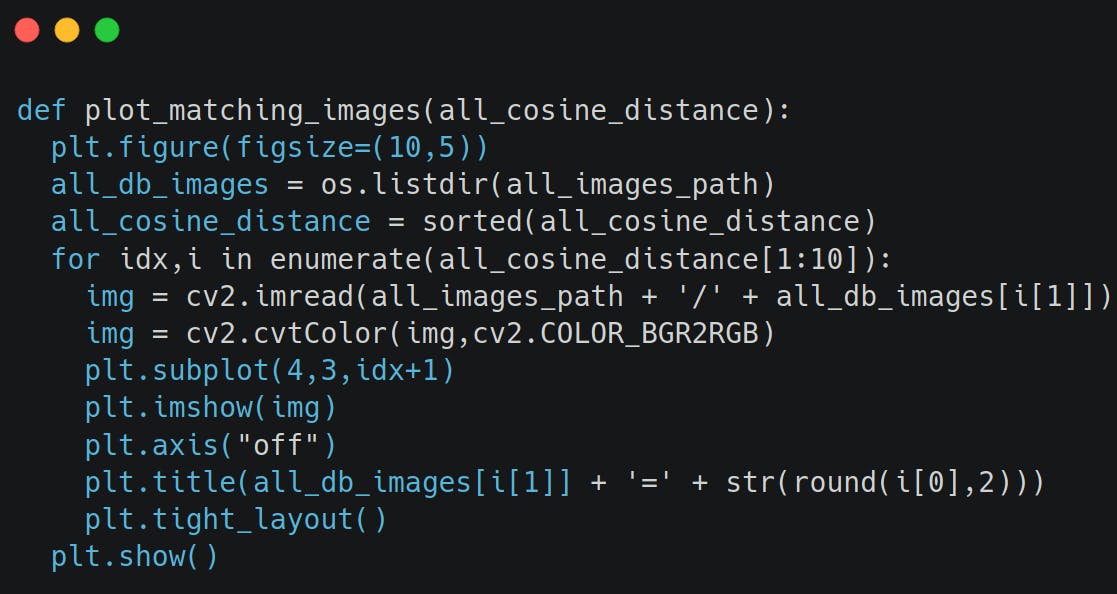
Step 8
Just Plot Those Images which best matches using Matplotlib.
Output
I gave one input image of 'Micky Mouse' and it return me first 9-10 images of Micky mouse only from Database (Stored Folder)
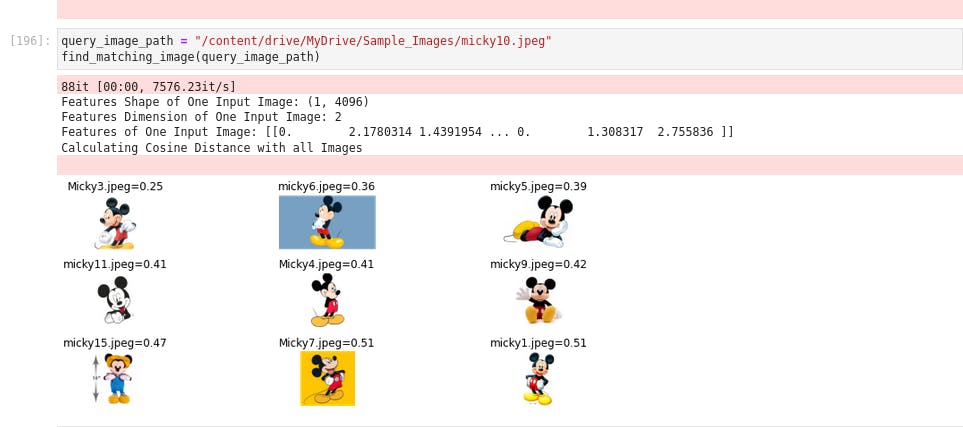
As I am using only 80-90 Images, Thus for Cat/Dog it's not giving correct result.
For Best accuracy => We need to increase our Sample Images Dataset size. (atleast 1000 Images)
You can find the Full code here https://github.com/Sumanshu-Nankana/Search-By-Image/blob/main/Search_by_Image_1.ipynb